
Changing themes on your site is a major routine task. If you don’t do it right, the website can break or at least be out of date. However, the biggest challenge that comes with changing a WordPress theme is the dreaded ‘broken site’ problem.
Then how can you change your WordPress theme while also making sure your website stays live? You’ve come to the right place. This post will show you how to change themes on WordPress without breaking your website and maintain a good balance between design and functionality.
Why Is It Necessary To Change A WordPress Theme?

WordPress themes are the basis of your website. It’s what makes you look like a professional or amateur when it comes to designing websites. Themes that are not well-designed tend to be bland and uninspiring, while those that are well-designed can make your site stand out from the crowd.
Then, why not just use the default theme? The answer is simple: WordPress themes are the heart of your website. They are the tools that make or break your site’s design and functionality. If you don’t know how to update a WordPress theme, your website will remain backdated, resulting in visitor loss.
There are several reasons why you should consider changing your WordPress theme:
- Themes have been updated in ways that may not be compatible with your site’s current functionality.
This can mean that the new version of the theme has been built from scratch or that it uses a different method for how it displays content on your site. So, it’s best to actively check for new updates when you first install a new theme and wait for developers to implement every feature into their software.
- Themes are often modified by developers who do not always follow guidelines outlined by their original creator.
When this happens, problems such as broken links and images can occur on your site. To avoid these issues, always check whether changes have been made before activating any new features or functionality on your site.
- You’ve been using the same theme for a long time, and now it’s starting to look dated or boring. So, you want something new that has a fresh look and feel.
- You don’t like the default colors or layout of your current theme and want better functionality than what’s available from the default options.
- You may want more control over your site’s appearance and functionality (for example, by creating custom headers and footers).
- Your site is huge, and it takes too long for search engines to crawl all of its pages when users enter search terms into their browsers.
There are many more reasons why changing your WordPress theme can be beneficial, but these are some of the most common ones that we come across on our own blogs every day.
What To Do Before Changing A WordPress Theme?
Before you change the theme, you have to do some pre-work. This can include:
1. Check your theme for conflicts with other plugins, themes, and pages. If any of these are installed on your site, you will need to make sure they’re compatible with the new theme.
2. Update your site’s core files and database structure. A lot of changes are made to WordPress core files when a new theme is installed, so it’s important to update those files before making any changes to the new theme’s design.
3. Test everything out on a staging website or local host first. You don’t want to make a change that breaks something else on your site just because you forgot about it while testing things out in development mode.
How To Change Theme In WordPress Without Breaking Website
In reality, it is not always possible to completely change the theme of your WordPress blog without breaking it.
If you have a very old theme, then changing the theme will break your website. This can be either because of the theme file or the template file. Sometimes you need to rename the themes directory in order to change them, but this will also make your website inaccessible to anyone who does not have access to that folder. That’s why it’s crucial to know how to change a WordPress theme in a proper way.
To avoid all these issues, we’ve prepared a simple step-by-step process where you can simply change your WordPress theme without affecting anything. Therefore, you’ll be able to prevent the breaking of your website or losing any data.
First Step: Arrange A Staging Copy Of The Website
It’s time to get a staging copy of your WordPress website.
Before you set up a staging environment, you should know what you’re doing. Obviously, you don’t want to lose any data or break your site! Here are some tips:
- Back up your current version of WordPress and test the staging environment before using it.
- Make sure you install all plugins and themes before starting the staging process.
- Make sure all links work correctly in the staging environment and everything loads properly when you go live on your site.
Not to mention, there are many ways to set up a staging copy of your WordPress website. You can use one of these methods:
1. Use FTP
2. Use a server
3. Use a client-side control panel (such as cPanel or Plesk)
4. Use a free hosting service
In our guide, we’ll show you the staging process using FTP, and the steps will be as follows:
- The first step is to download a copy of your website. This can be done using FTP software like FileZilla.
- Once you’ve downloaded the copy, it’s time to install WordPress on your staging site. To do this, log into your new WordPress install with an account that has to write access to the root directory and use wp-schedule (or wp-config) to set up a cron job that runs every minute.
- Then, the cron job will create a folder called “wp-content” in your staging site and upload all of your files from the live site into it.
- Now that you have everything set up for staging on your server, it’s time to move over the files! You can do this by manually copying them over or using something like WinSCP or FileZilla again.
Second Step: Preview New Theme After Installation
To install a new theme, you will need to locate the installer for your theme.
- The first thing you’ll need to do is find the zip file that contains the files for your theme. The easiest way to do this is by searching through your WordPress Dashboard for the name of your theme, then clicking on it in the search results.
- Once you’ve clicked on the link to download that file, you’ll see a dialog box asking if you want to install it right away or view it first. Select “Install Now” and click “Okay.”
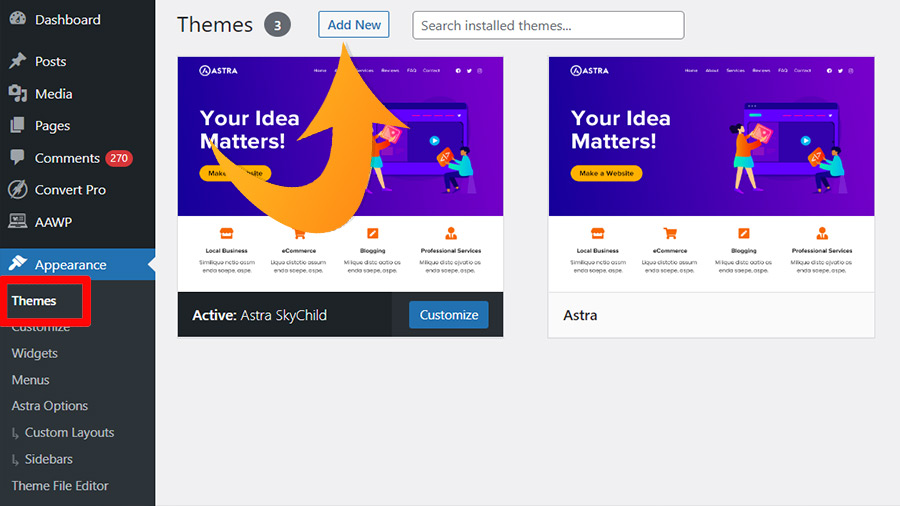
- Once installed, you can preview your new theme by going back into your WordPress Dashboard and clicking on Appearance > Themes > Add New Theme. If all goes well, there will be an option in this menu called “Preview Theme.” Clicking this should take you to a page where you can preview what your site will look like when using this particular theme.
Third Step: Activate The Newly Installed Theme
After you’ve installed a new theme and previewed it, you’ll need to ensure that the new WordPress theme is installed. This is done by enabling the theme in your WordPress dashboard.
To activate your new theme:
- Log in to your WordPress dashboard.
- Click on the “Appearance” link at the top of the page.
- Select the “Customize” button in the upper-right corner of the screen.
- Press on “Themes” from under Appearance.
- Click on “Activate Theme.”
- Finally, your new WordPress theme is activated now.
Fourth Step: Fix Errors And Check For Data Loss
After installing the new WordPress theme, you may encounter problems with the design and coding of your site. In this case, you will have to fix errors and check for missing data so that you can replace them immediately.
After identifying any errors, you have to edit the template file index.php.
1. Access your WordPress dashboard and navigate to Appearance > Themes.
2. Click on the theme you wish to edit and select Edit HTML from the menu options.
3. A screen will come out next with a new page.
4. At the top of the page, click on the green arrow next to Advanced Options and select Themes from the drop-down menu.
5. Then, click on HTML/CSS on the left sidebar and choose your theme from there before going through each option listed in order.
6. At Step 2, click on Save Changes when prompted.
If your website fails to match any part of the theme and you cannot solve it, an effective way to resolve any issue like that is by using an online tool such as WP Rollback. This tool allows users to roll back their websites back up to a previous version without having to reinstall their software or back up all of their content.
Last Step: Replace Live Website With Staged One
Now, you need to push your staging website live. It is recommended to push your staging website live before you publish it on your live site. This way, if there are any issues with your staging site, you can fix them quickly and easily. So, replace the existing website with the staging copy.
To push a staging WordPress website live, follow these steps:
1. Log in to your WordPress admin dashboard.
2. Click on ‘Staging’ under ‘Settings’ in the left sidebar of your WordPress admin dashboard.
3. Under ‘Staging settings’, click on the ‘Push the current staging site live’ button.
4. After that, you can check if there is any issue with your live site before publishing it.
Finally, your WordPress website is ready to go public, even without breaking anything, and now you know how to update a theme in WordPress without losing any data! Anyway, you can test the website to check the issues thoroughly to make any necessary adjustments.
What To Do After Changing A WordPress Theme?
After changing a WordPress theme, you need to take care of the following:
1. Make sure your website is still live and up-to-date.
2. Upload the new theme file to your server and activate it by entering the newly created header and footer pages in WordPress.
3. Update all plugins, widgets, etc., that are affected by the change.
4. Enable all options in the new theme file (such as a featured image or page layout).
Which Contents Will You Lose For Changing A WordPress Theme?

There are some things that you can lose if you change your theme. To be specific, you may lose some of the customizations you’ve made to the site if the theme differs from what you’ve customized in the past. However, you can’t lose any of your WordPress database, files, and folders.
So, you can lose these things:
1. Your customizations and plugins. If you have made any customizations for your site, then the changes will be lost. Also, if you have custom post types such as single author, single author blog, image gallery, and video gallery, you will lose them if you change themes. Furthermore, you can lose your custom fields and taxonomies. This means that every category on your site, they will be lost when switching themes.
2. The design of your site will change with the new theme, so it may not look as appealing as before.
3. All the content on your site will be moved to a new location which may create more work for you in the future.
4. Your SEO information will also change if you choose a new theme, so it is essential that you manually check on this before making any changes.
To Sum Up
While WordPress themes are easy to add or remove, it’s a good idea to back up your content before you begin any significant changes. And if you’re not sure about your abilities to change a WordPress theme or don’t know how to update a theme in WordPress, avoid making any jumps until you speak to at least one expert. It’ll be time well spent and can save you a lot of trouble in the end.